Now that we can see all of the subject in focus at once, from front to back, wouldn't it be nice to see it in three dimensions? We can do this by taking two shots from different angles, and combining them side-by-side in a stereo pair.
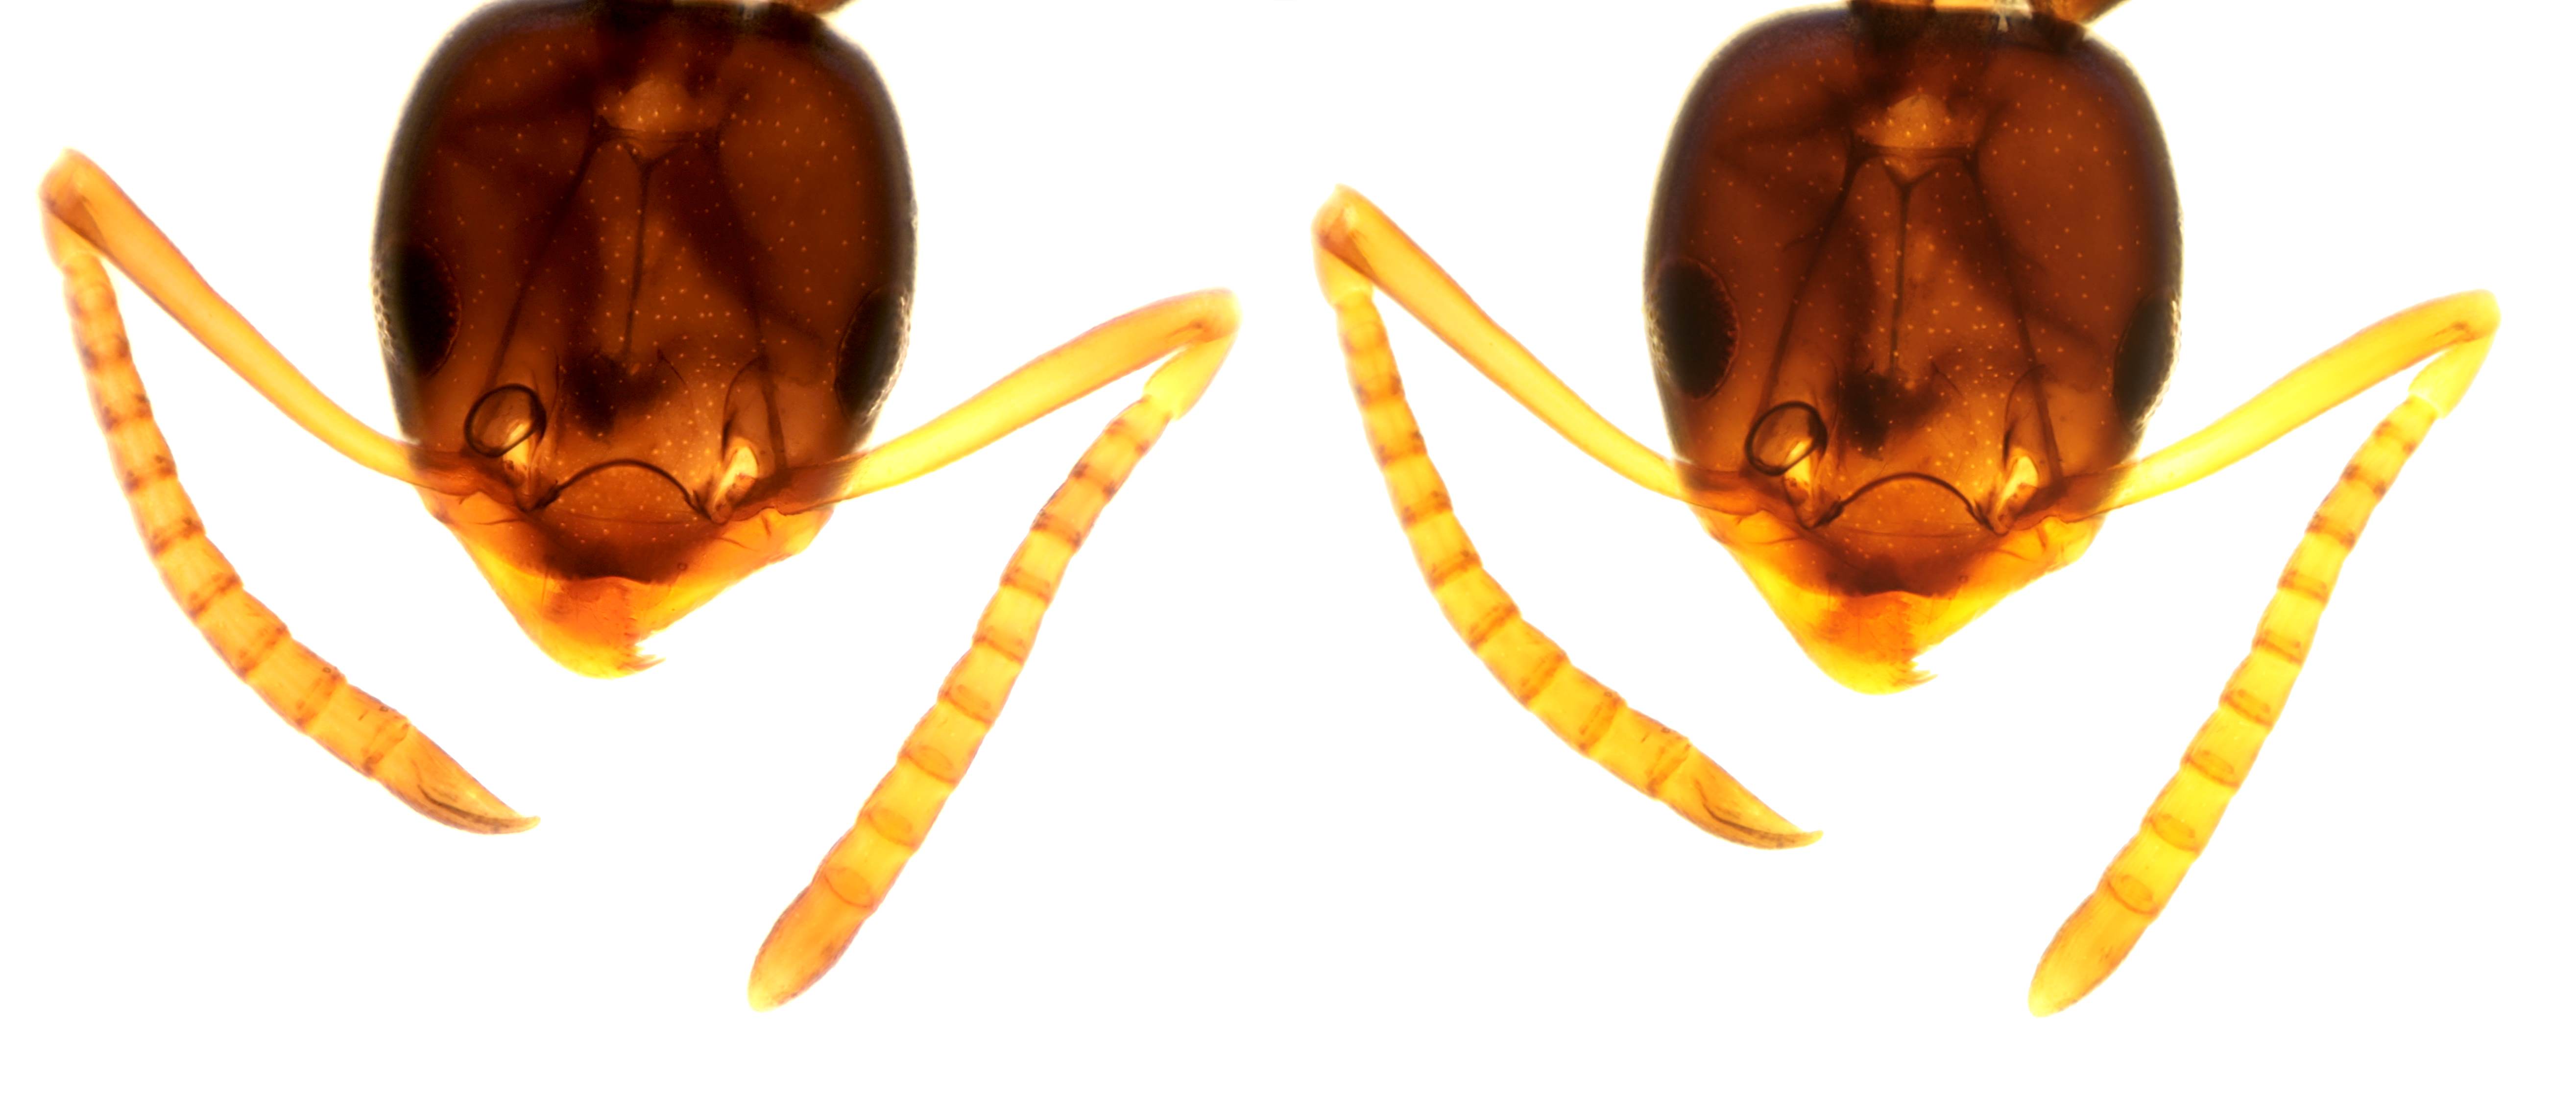
Here is a stereo pair of Ant Millie's head:
(Click on any of the images to see them full size.)
You view it in three dimensions simply by crossing your eyes until a third image sits between the two. This central image will be in 3D. You can see through Ant Millie's head, and the little pores in the top of the head will swim in front of the structures at the bottom of the head.
If you prefer to view 3D images by focusing on infinity instead of crossing your eyes, just turn the picture upside down:
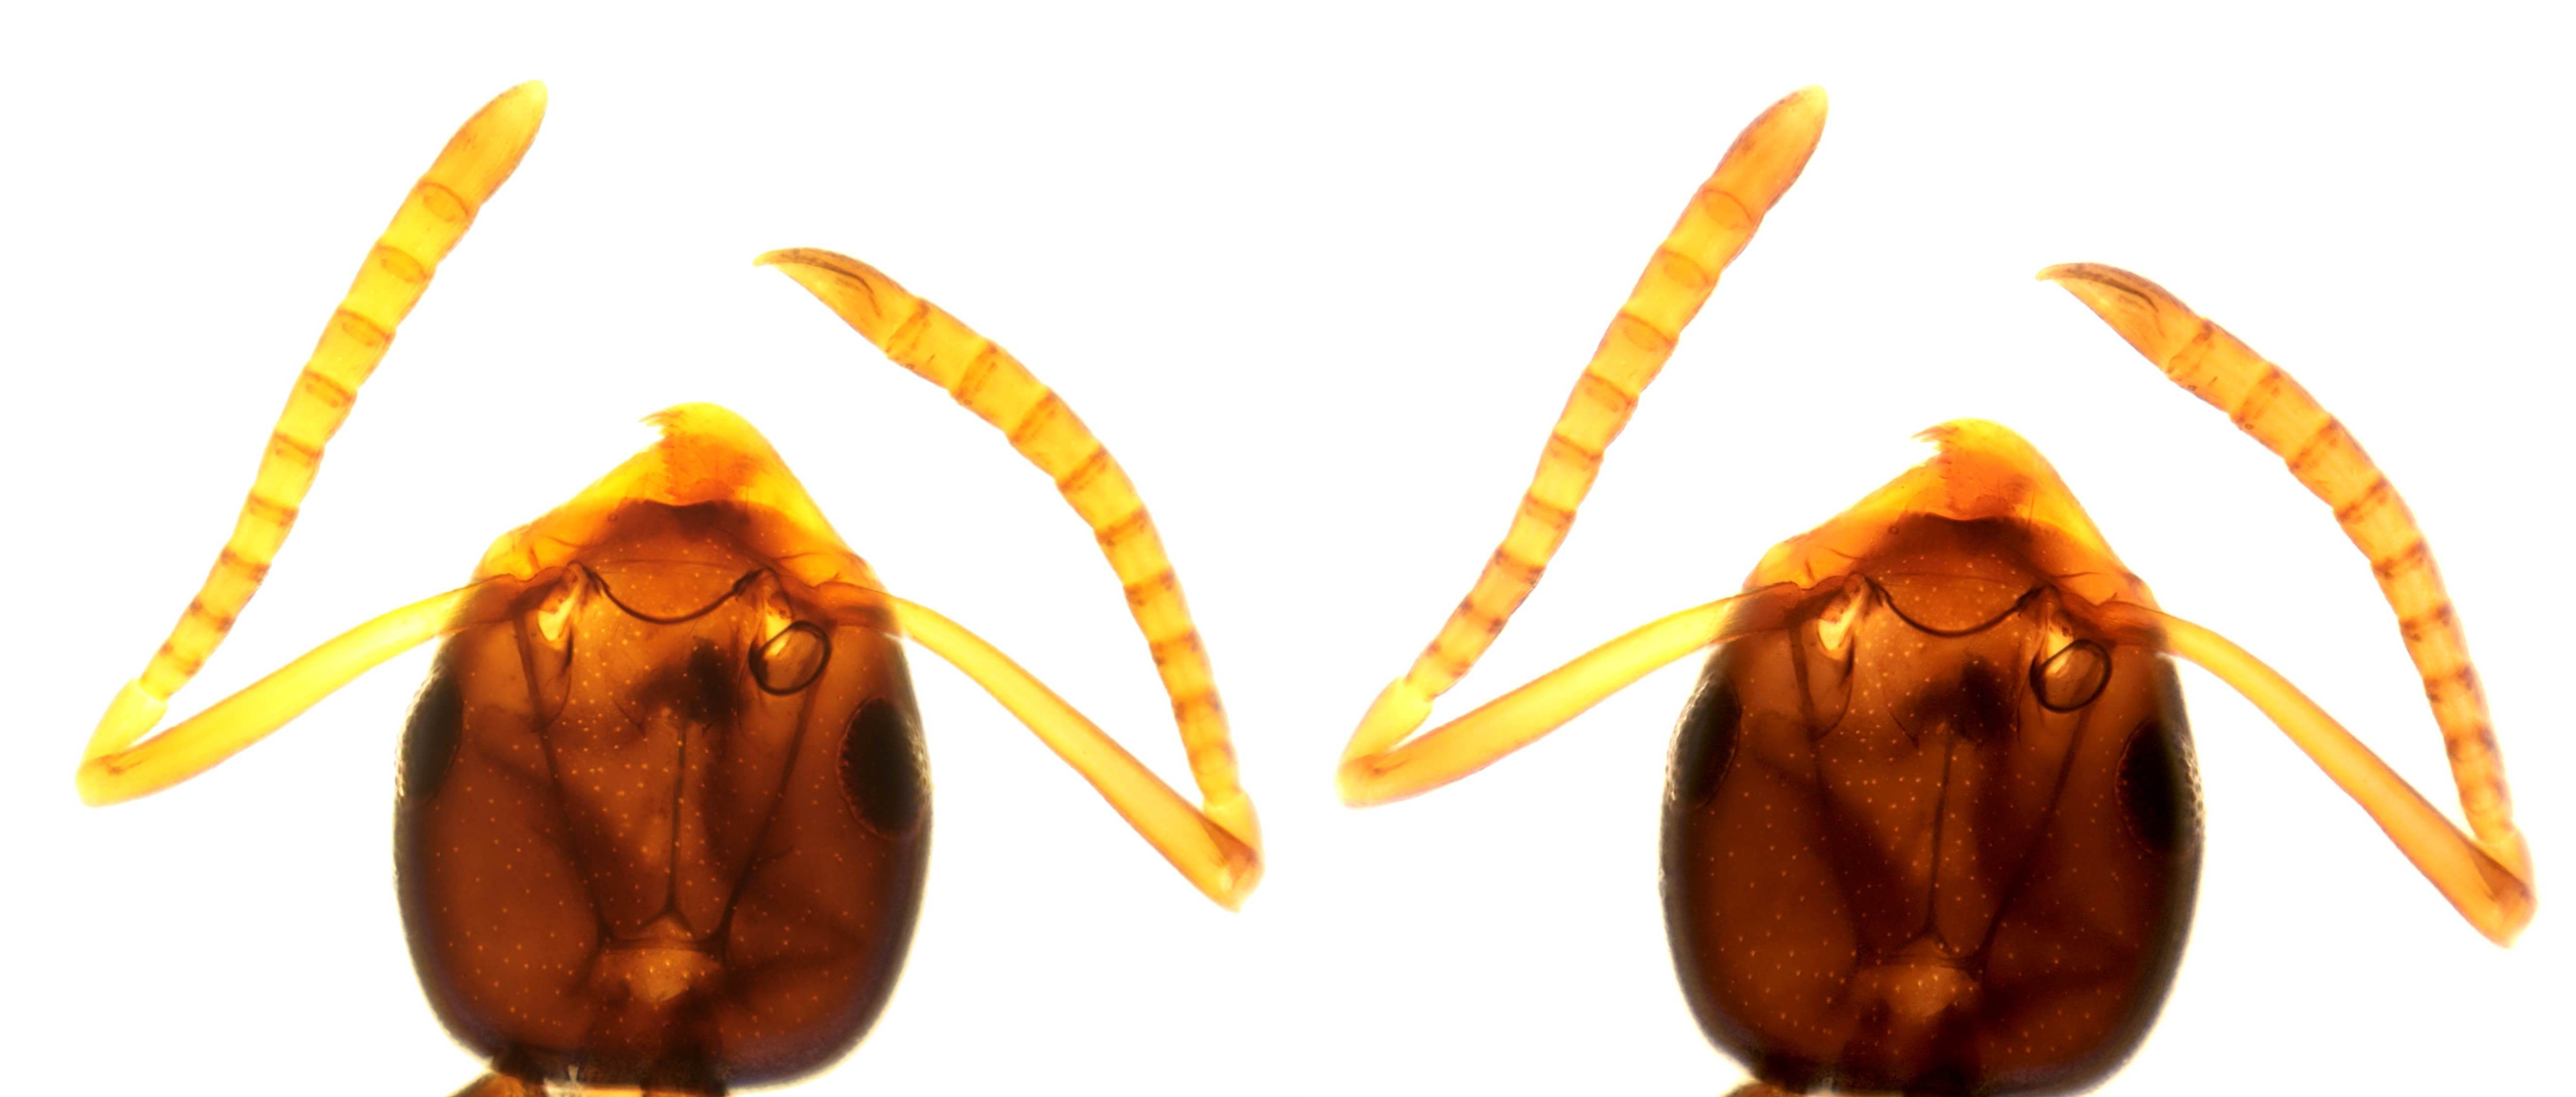
This mode is also good for viewing with 3D viewers, but the cross-eyed method works with pictures of any size. The wall-eyed method (looking at infinity 'through' the pictures) works best when the pictures are separated by the same distance as your pupils are.
We can take stereo images through the microscope only because we can stack the photos using software to get all of the subject in focus. This is because when we take each photo, we tilt the slide on the microscope stage to get a different angle.
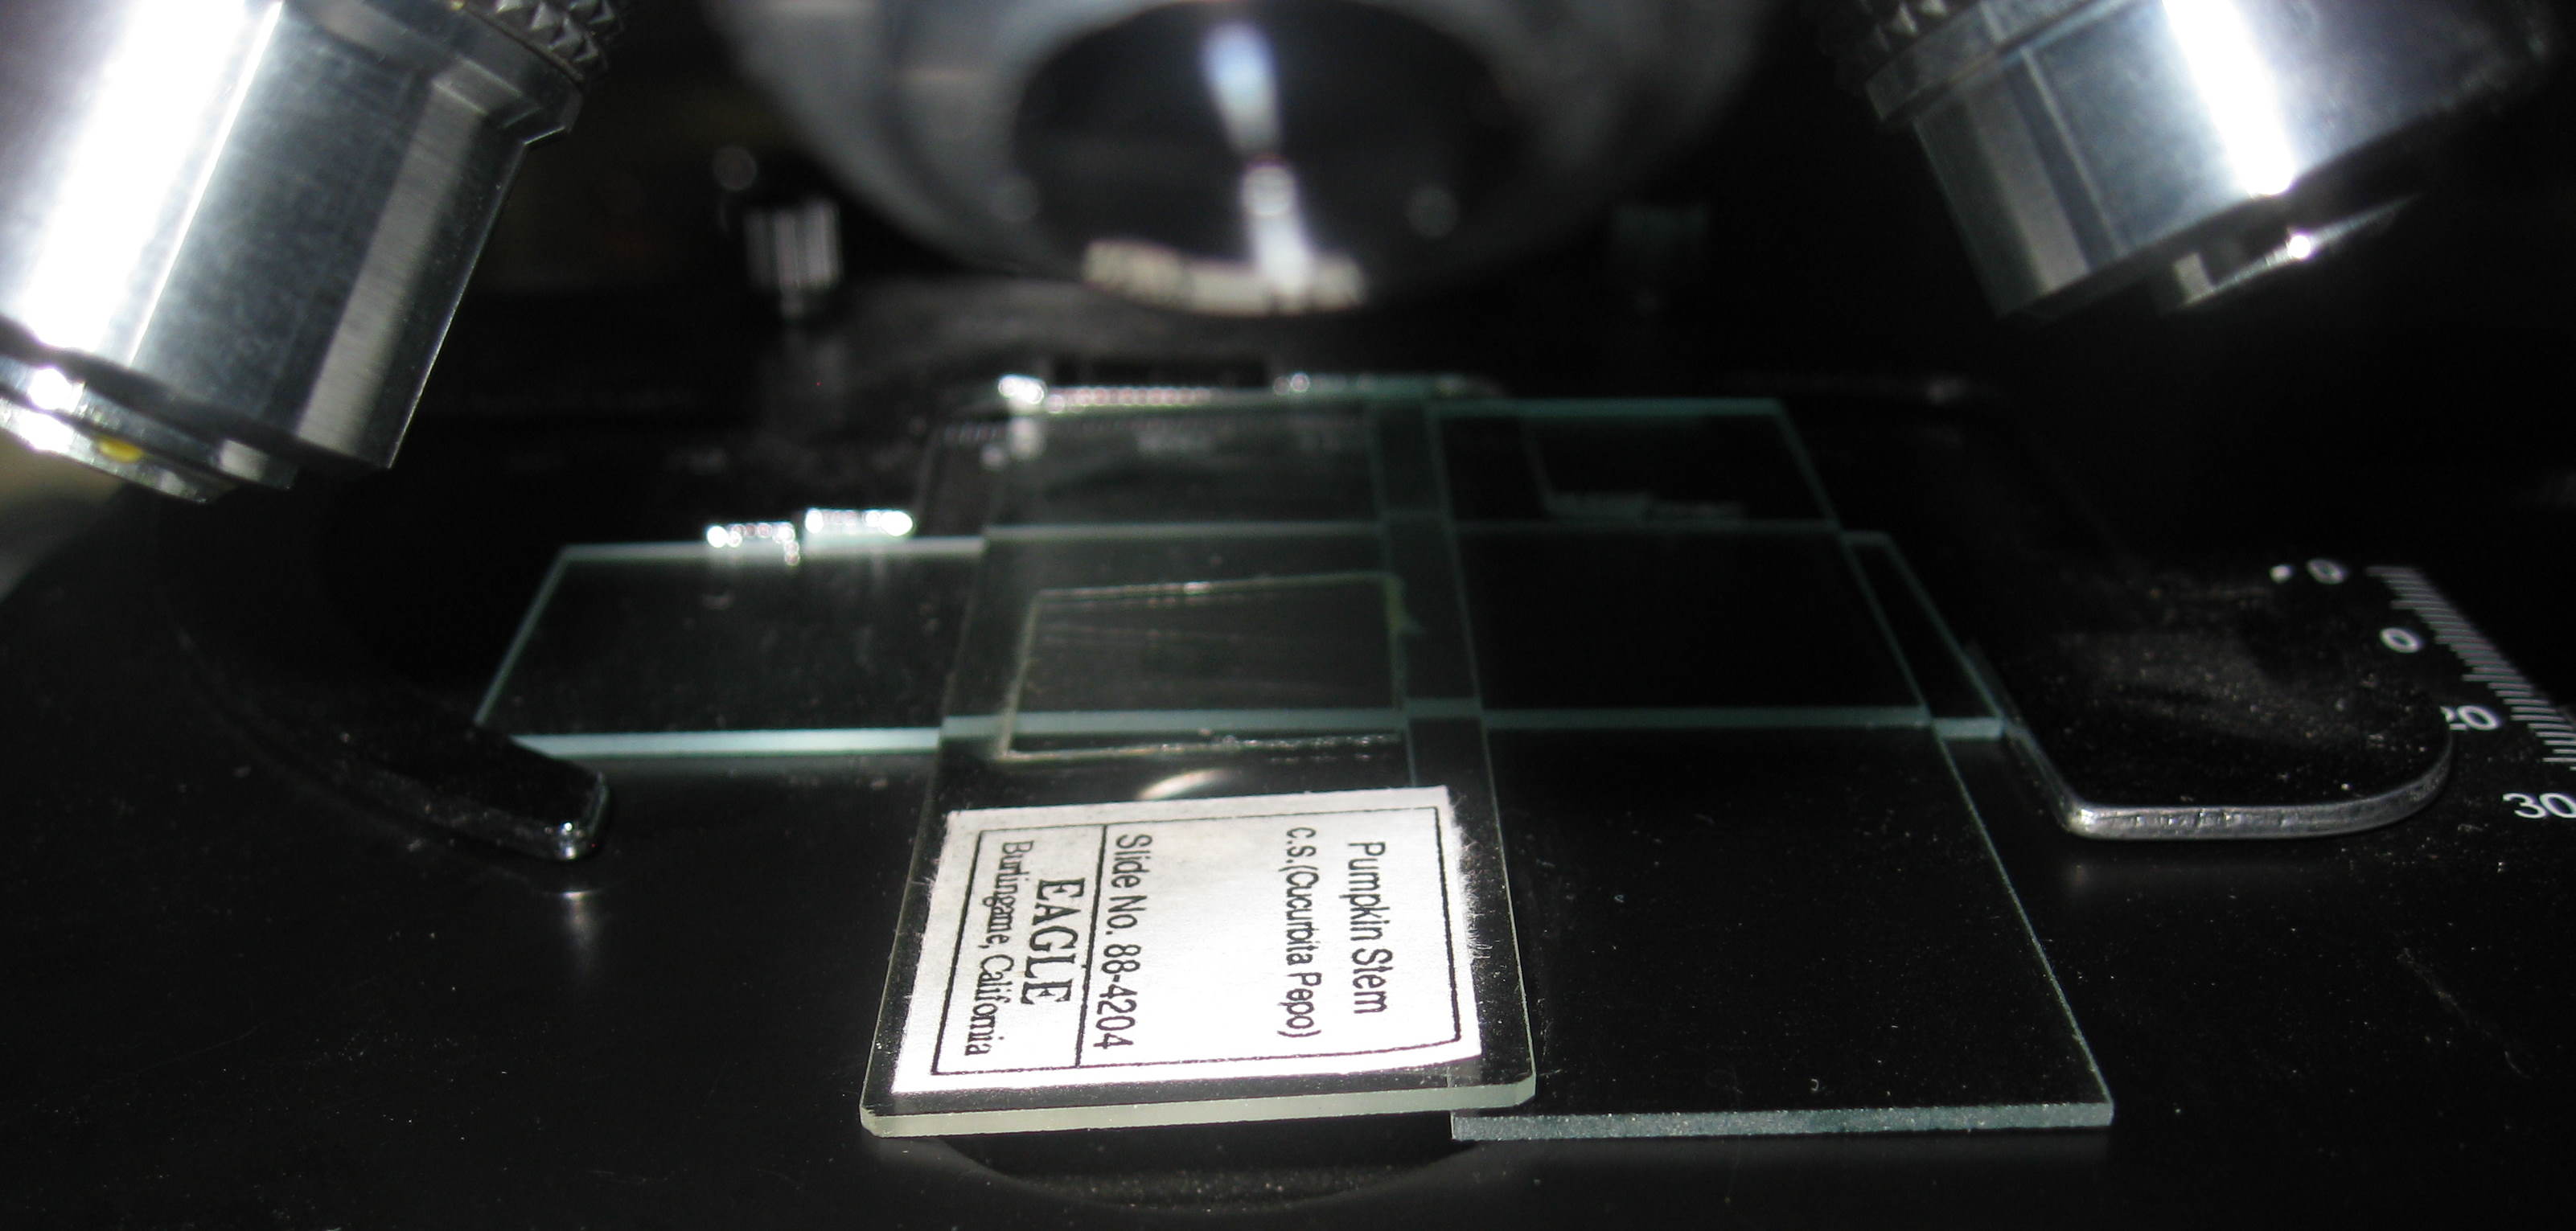
I use three slides to do this. One blank slide is placed in the normal fashion on the microscope stage. This is to cover the slot in the stage where the condenser light comes through, so the next slide won't fall through the slot.
The next slide is also blank, and is placed lengthwise on top of the first one. This slide is just there to provide a tilt to the third slide, which is the slide with our subject on it.
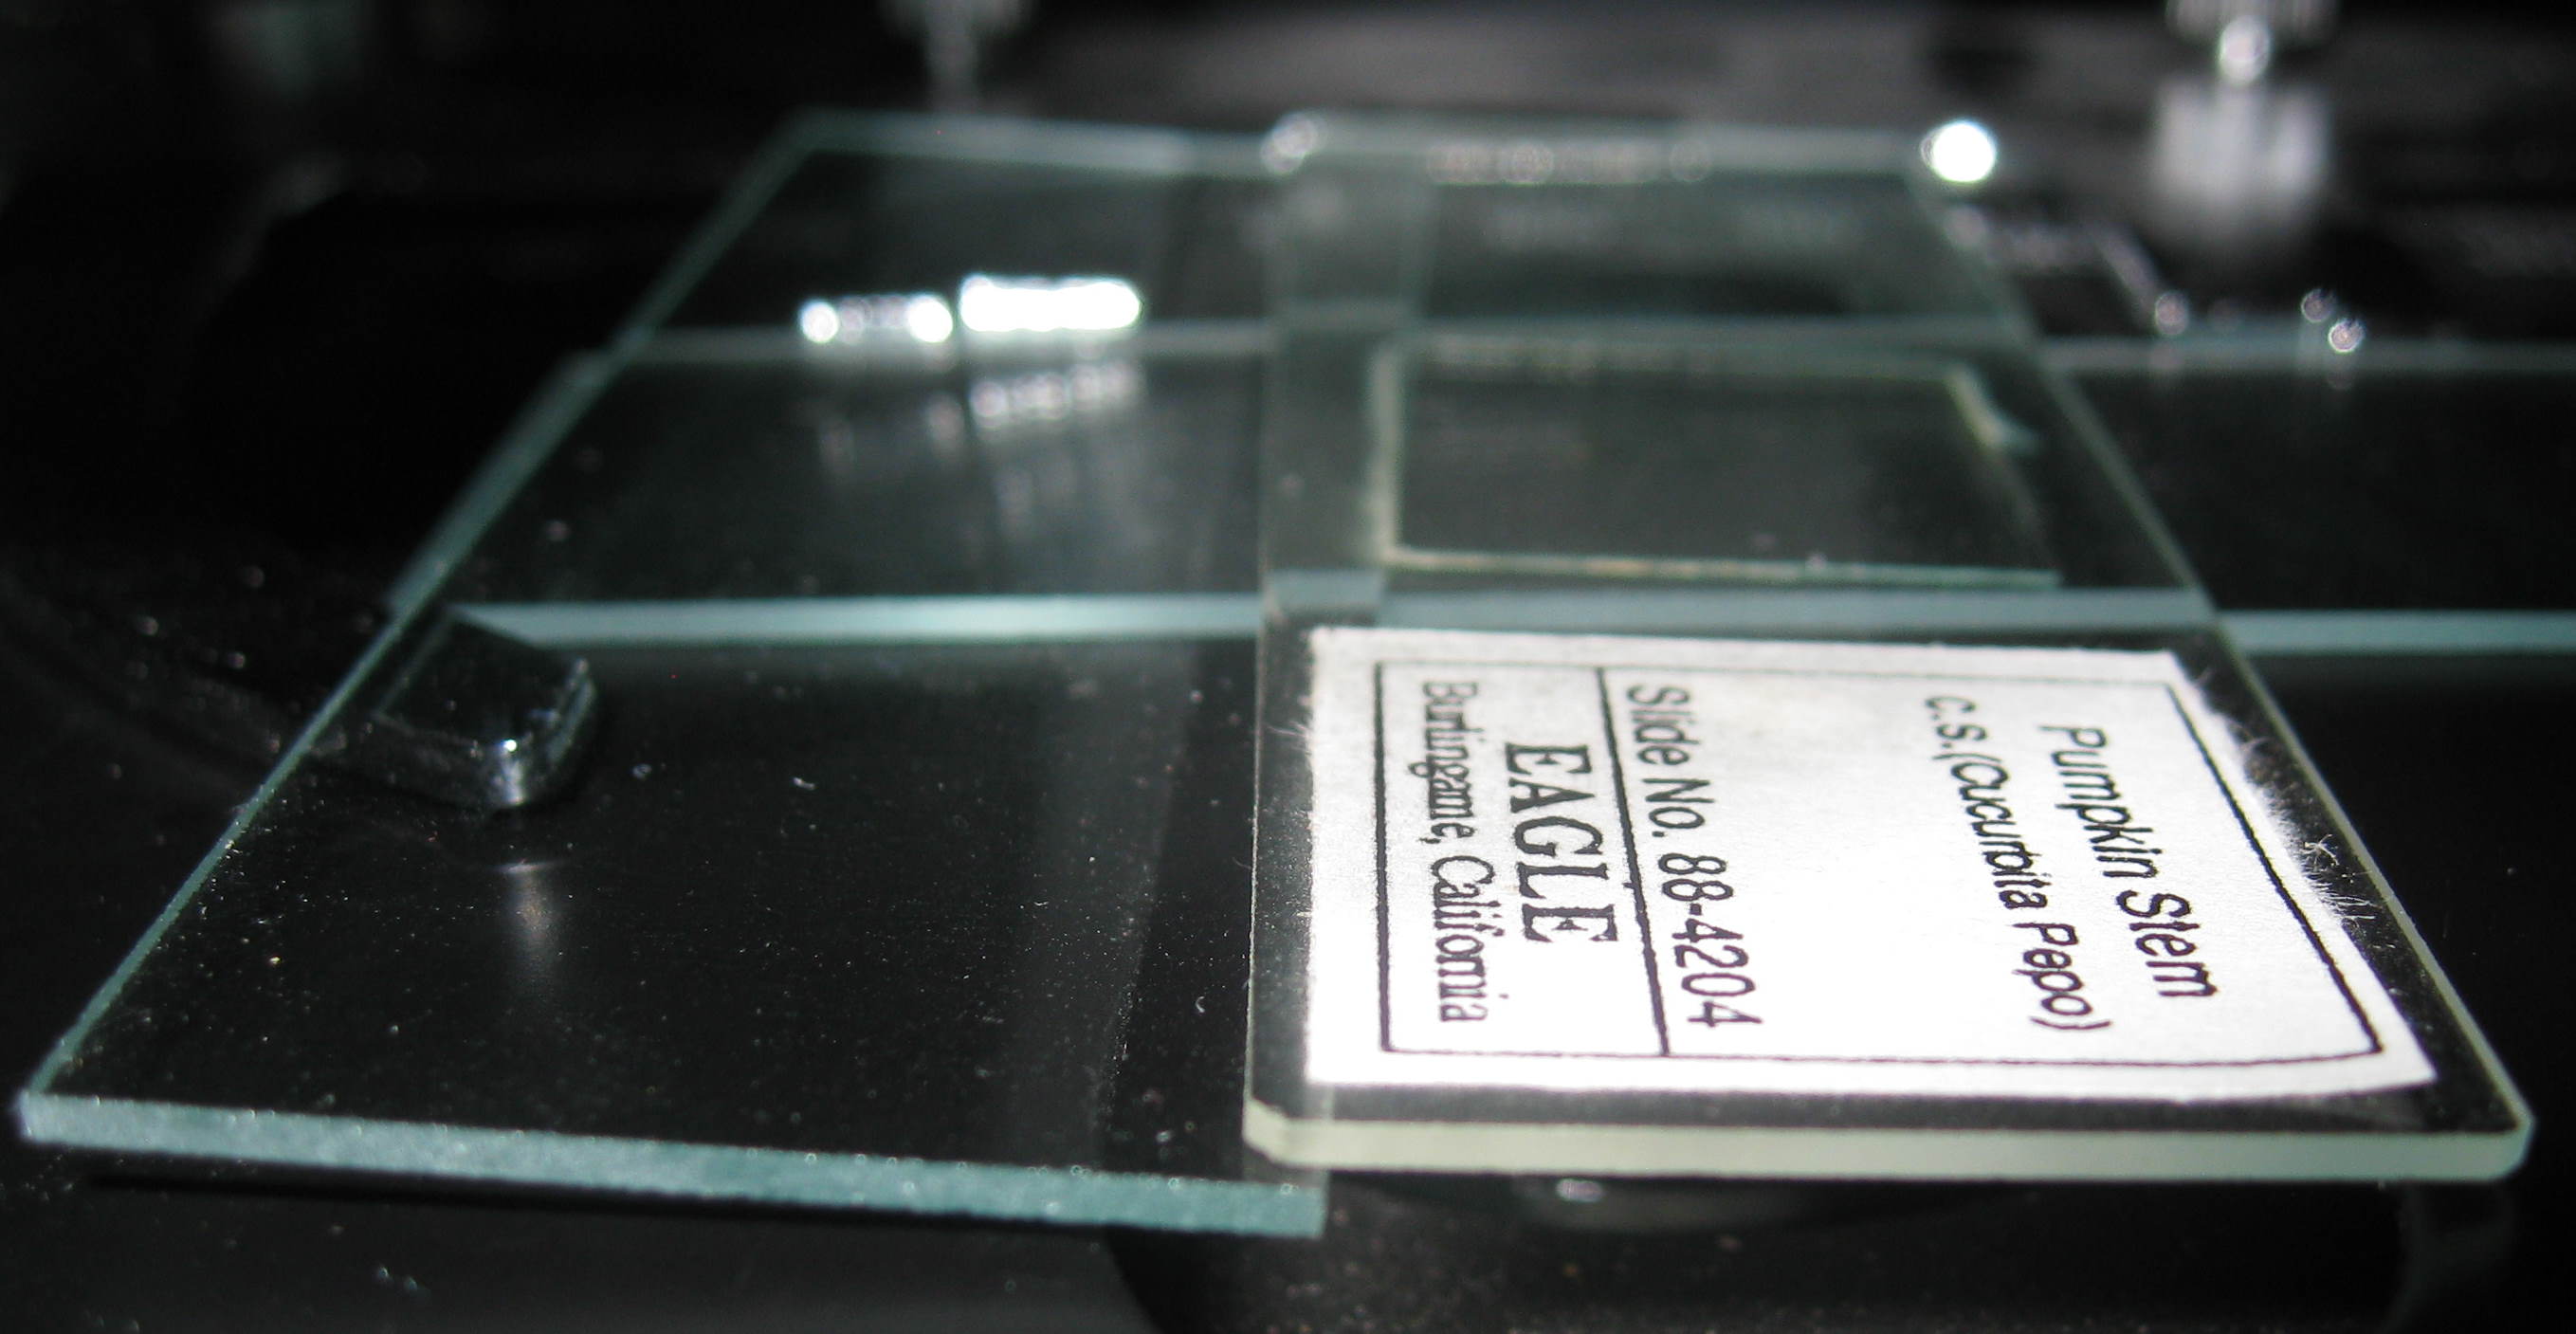
The third slide is placed lengthwise on the stage, with one side resting on the stage, and the other side propped up on the second slide. This makes the slide tilt, so we can photograph it from an angle.
We now take a series of shots (five to a dozen of them, depending on the magnification), each at a different focal depth, to get our stack of shots at each focus.
Next, we slide the prop slide over to the other side, so the subject slide is tilted the other direction. Now take a series of shots from that angle.
Combine each stack in CombineZP or some other stacking program, and then place them side-by-side in your final image.
You can do more extreme angles under low power than you can under high power, because the distance between the objective lens and the slide is greater at low magnifications, and you can focus over a deeper range.
To get larger angles at higher powers, you can cut cover slips in half, and make a slide from just the cover slips, with the subject cemented between them. Now you have a tiny microscope slide, and you can tilt it at high angles and still focus closely on it with higher power objectives.